Creating blocks
To create a block, follow the steps described below.
-
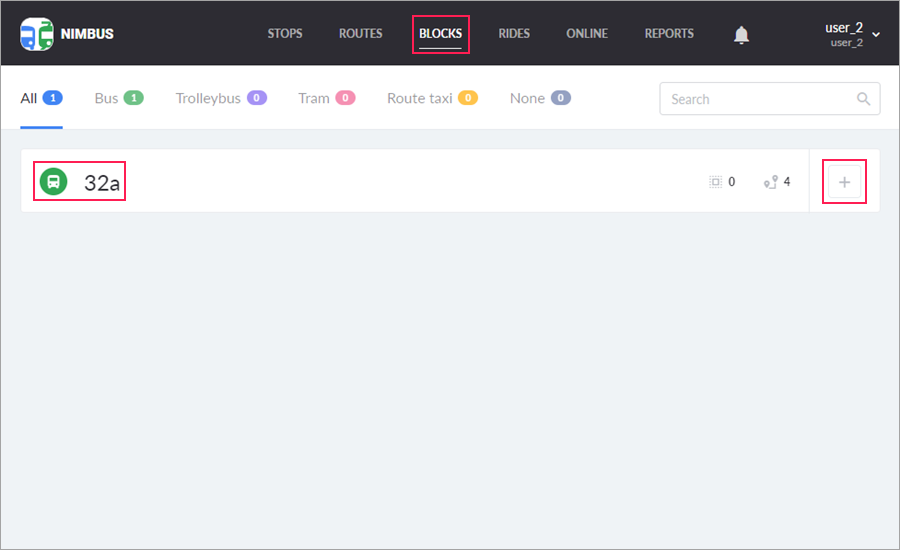
Click on the Create block button (
 ) located at the end of the line with the required collection of routes. A similar button is located on the page with the blocks of each collection of routes (
 ).
). -
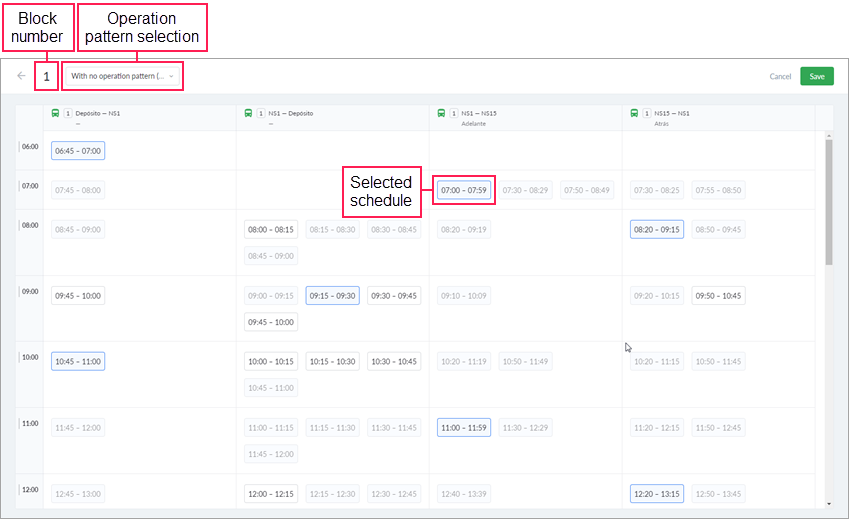
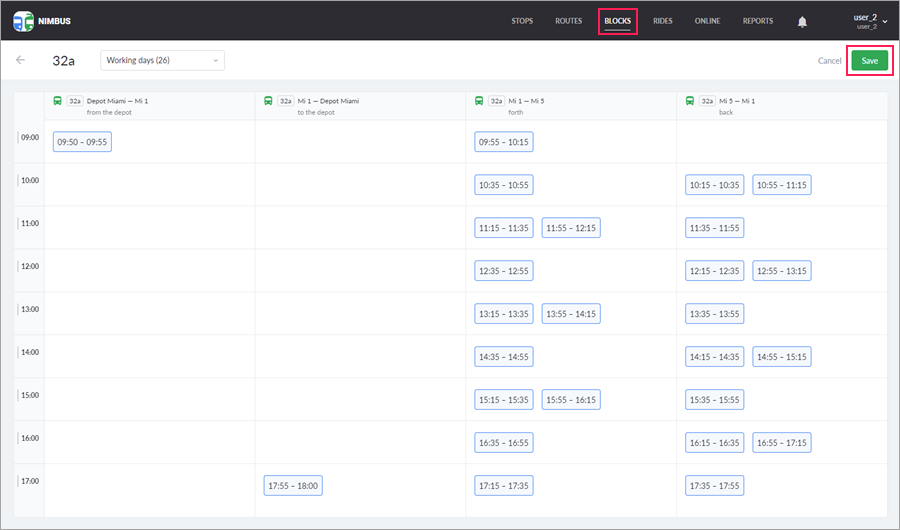
In the block creation window, specify its number (required field). The maximum length of the block number is 8 characters (numbers and letters).
-
Select the operation pattern in the drop-down list to the right of the number. As a result, the routes that form the collection are displayed below with a list of their schedules that correspond to the specified operation pattern. You can see only those routes that are switched on and have at least one schedule.
-
Specify the schedules that should be included in the block. To do this, successively click on the required schedules. The selected schedules have a light blue background and a blue frame. The schedules that cannot be selected due to the time intersections become inactive.
-
Save the block. The Save button becomes active only after selecting at least one schedule.
Deleting all the schedules of a block leads to automatic removal of the block itself from the system.
The schedules of which the block consists should meet the following requirements:
- The operation pattern should not be specified for schedules, or it should be uniform for all.
- One schedule can be included only in one block within a depot.
- There should not be any time intersections in the blocks of one route: the program does not allow you to save the created or edited block which overlaps other blocks.
Example of creating blocks
This example shows how to work with blocks in NimBus beginning from the creation of the routes. Let us take as an example the following situation: a bus should leave the bus depot at 09.50, execute the route 12 times in both directions and return to the depot by 18.00.
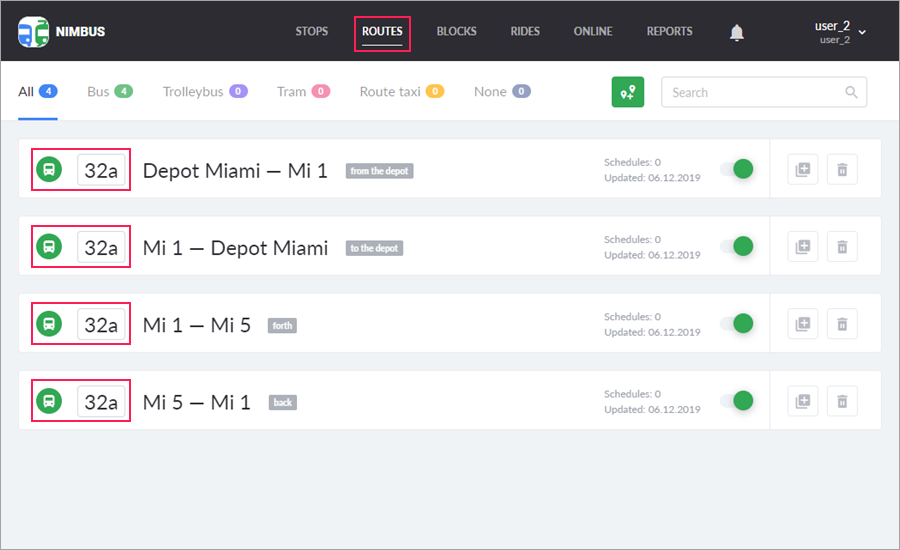
- On the basis of the prepared stops, create four routes: from the depot to the first stop of the main route (you can indicate from the depot in the description); from the first to the last stop of the route (forth); from the last to the first stop (back); from the first stop to the depot (to the depot).
All the routes should be of the same name and type. In our case, the type is Bus.
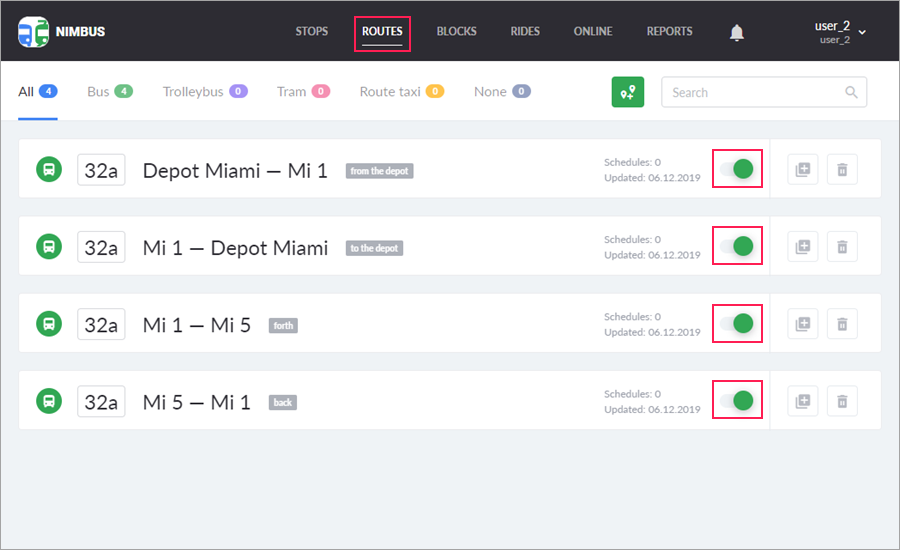
- Make sure that the switch of automatic creation of rides is activated for all the routes.
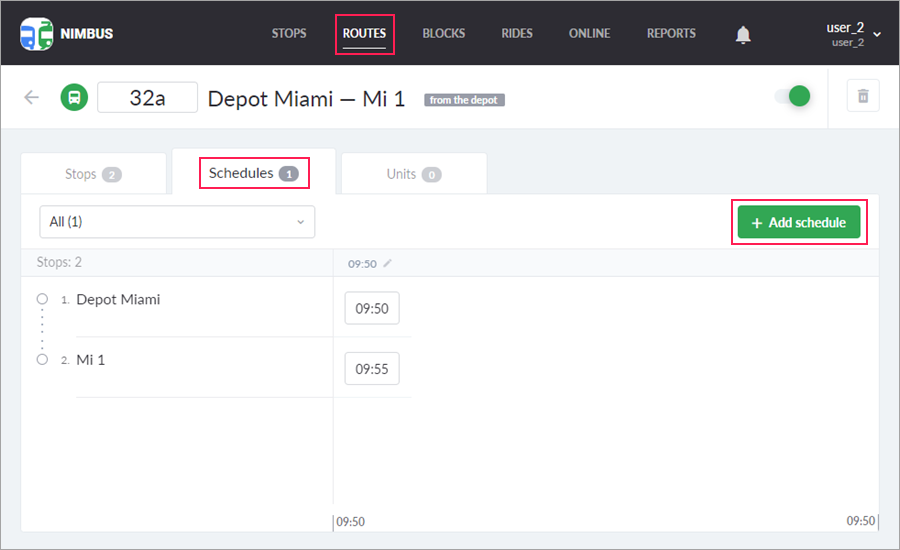
- Add schedules on the Schedules tab of the route properties. Repeat this step with each route. The same operation pattern (or none) should be applied to all the schedules.
- On the Blocks page, where the four created routes have already been combined into a collection of routes, click on the icon ().
- Select the schedules that should be included in the block. Click Save.
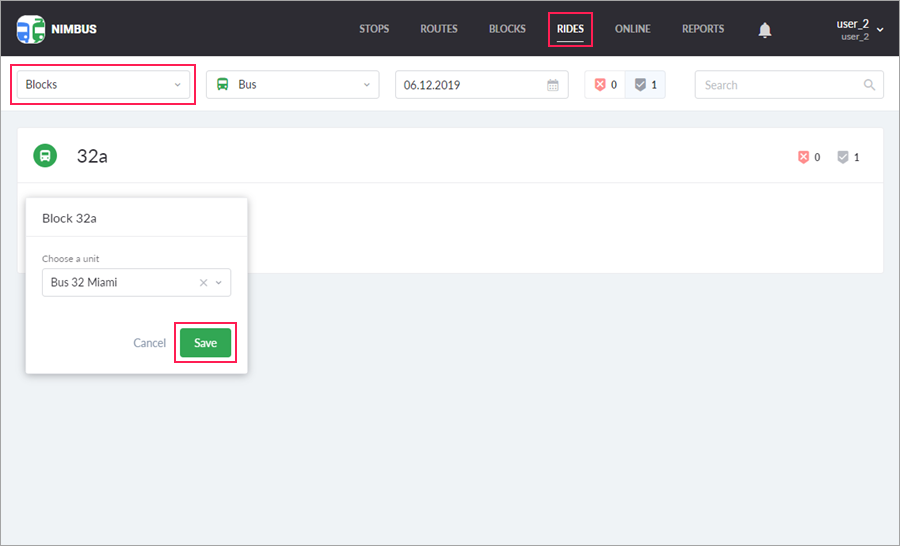
- On the Rides page, select Blocks in the drop-down list. Click on the necessary block and assign the unit that should execute rides. Click Save.
The block is ready. Now you can track it on the Online page and, if necessary, execute reports on a collection of routes.